Assisting a corporation to brand Microsoft Office suite (Microsoft 365 Apps) templates with their corporate logo was one of my most recent professional endeavors. One of the requirements was to keep these templates current and easy for the branding team to add, remove, or modify as needed.
Thankfully, Microsoft 365 came with a feature that made just that possible. In this article, we’ll examine how to set up the functionality in a matter of minutes.
You will most likely move your data to SharePoint when moving to a contemporary workplace, but how will you ensure that every user has access to the Office templates?
There are multiple choices available to us.
- Publish templates through Using Office 365 CDN, create an online library of organizational assets and deliver them to end users’ devices.
- Publish templates to your team site and OneDrive automatically.
- Publish templates for Microsoft 365 apps using GPO
- Publish templates for Microsoft 365 apps with Intune

In Microsoft 365, there are two types of CDN:
Private Origin: Content published on the CDN requires user authentication.
Public Origin : The CDN’s content is anonymously accessible.
The private CDN is utilized by default for SharePoint Organization asset libraries. You don’t want to use the public CDN because you want your Office Templates to be accessible solely to logged-in users.
So in the following steps, we’re going to publish the SharePoint Asset Libraries to the Microsoft 365 CDN: Our SharePoint libraries will be recognized as “Origins” for the CDN.
Step 1: Create a communication Site
The first action is to establish a dedicated new SharePoint communication site. Give it a meaningful name so that everyone is aware of its purpose.

Step 2: Upload Microsoft Apps templates
We must upload the necessary PowerPoint and Word/Excel templates to this SharePoint site.
Please ensure that the file you upload is in the “Office Template” format.
- PowerPoint in potx format
- Word in dotx format (if necessary)
- Excel in xltx format (if necessary)

Step 3:
Provide read only permission with everyone who needs the templates

Step 4:
In next step, for some configuration elements, the SharePoint Online PowerShell module will be utilized. In the event that you haven’t installed this, kindly follow the instructions listed below.
Install-Module -Name Microsoft.Online.SharePoint.PowerShell

Step 5:
Let’s now establish a connection to the SharePoint Online management portal.
Connect-SPOService https://tenant-admin.sharepoint.com

Step 6:
Convert document library to an asset library
Make sure you have copied the same library path from the SharePoint site you have created
Add-SPOOrgAssetsLibrary -LibraryUrl “https:// tenant.sharepoint.com/sites/office %5Ftemplates/wdvdcloud” -OrgAssetType OfficeTemplateLibrary
Make sure you must change the site url to your own template location

You could type below mention command to find out if the asset library has been built.
Get-SPOOrgAssetsLibrary.
You can use this command line to verify if it’s private if you’re truly concerned about it.
Get-SPOTenantCdnOrigins -CdnType Private

Important Reminder: We Must Be Extremely Patient. For my tenants, it took a very long time before it showed up on the Desktop Apps. It can take up to a day for the modifications to spread throughout the devices. This is due to the fact that it uses the CDN, which only occasionally refreshes the cache. Therefore, exercise patience.
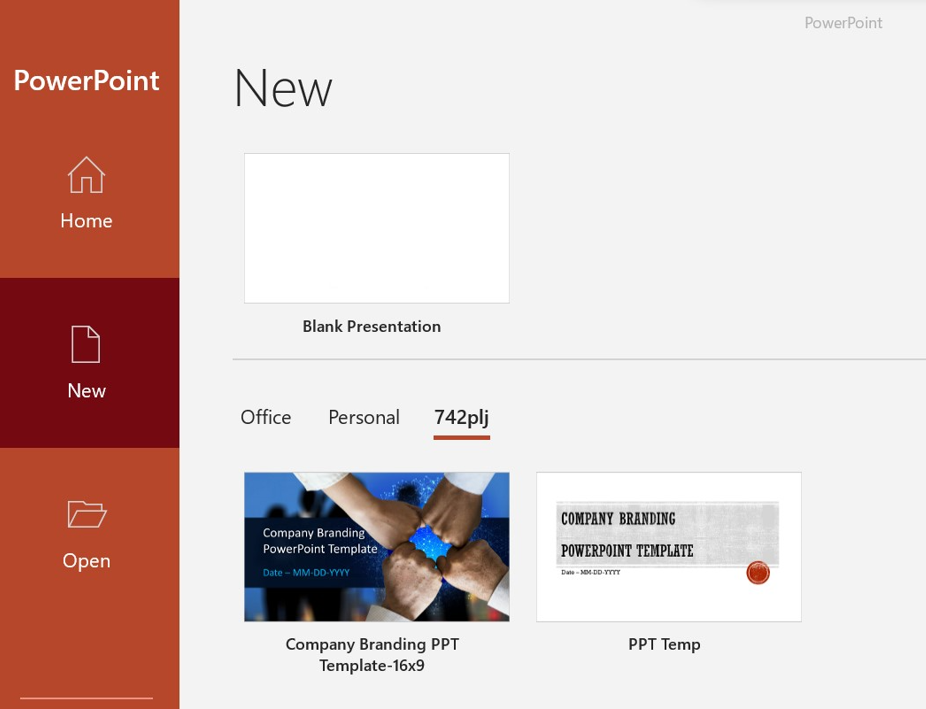
Below will be the final expected result.

Kindly be sure to leave a remark if you have any questions or concerns.